


including character latex
& fx contacts lenses


Link to this site!
|
How to make...
Paper Mache SPIDERS
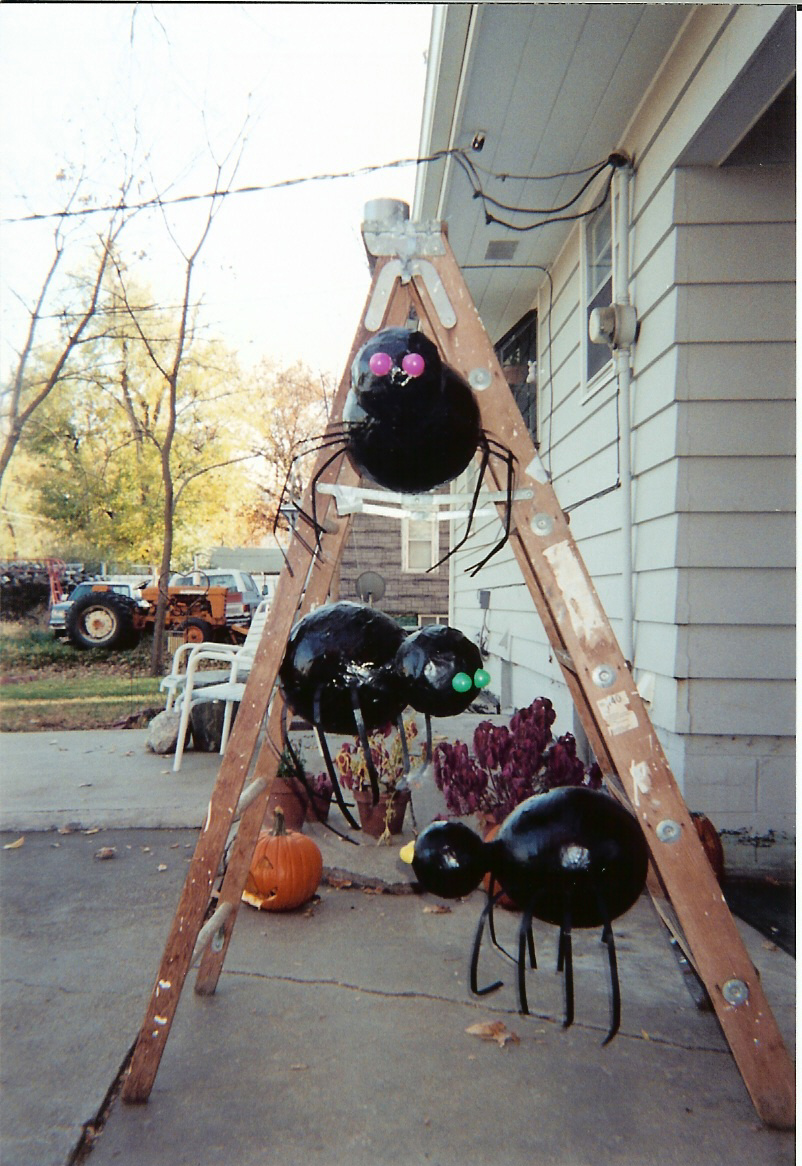
To make a spider you will need,
2 - 12" balloons,
glue (either elmers or super glue)
hot glue gun & sticks,
8 plastic ribbons (these are the plastic strips that go around a package like a ribbon and is melted together to make sure the package won't open during shipping- they throw these away at my work from parts "shipments" that come in, if all else fails I'm sure you can get some at your local grocery store),
black spray paint,
acrylic, clear spray paint, or polyurathne to weather protect it,
2 small plastic easter eggs (the small ones you can put candy into),
fishing line,
glue mixture,
2" newspaper strips,
1 tomatoe cage,
elmers glue,
1 gallon ice cream bucket.
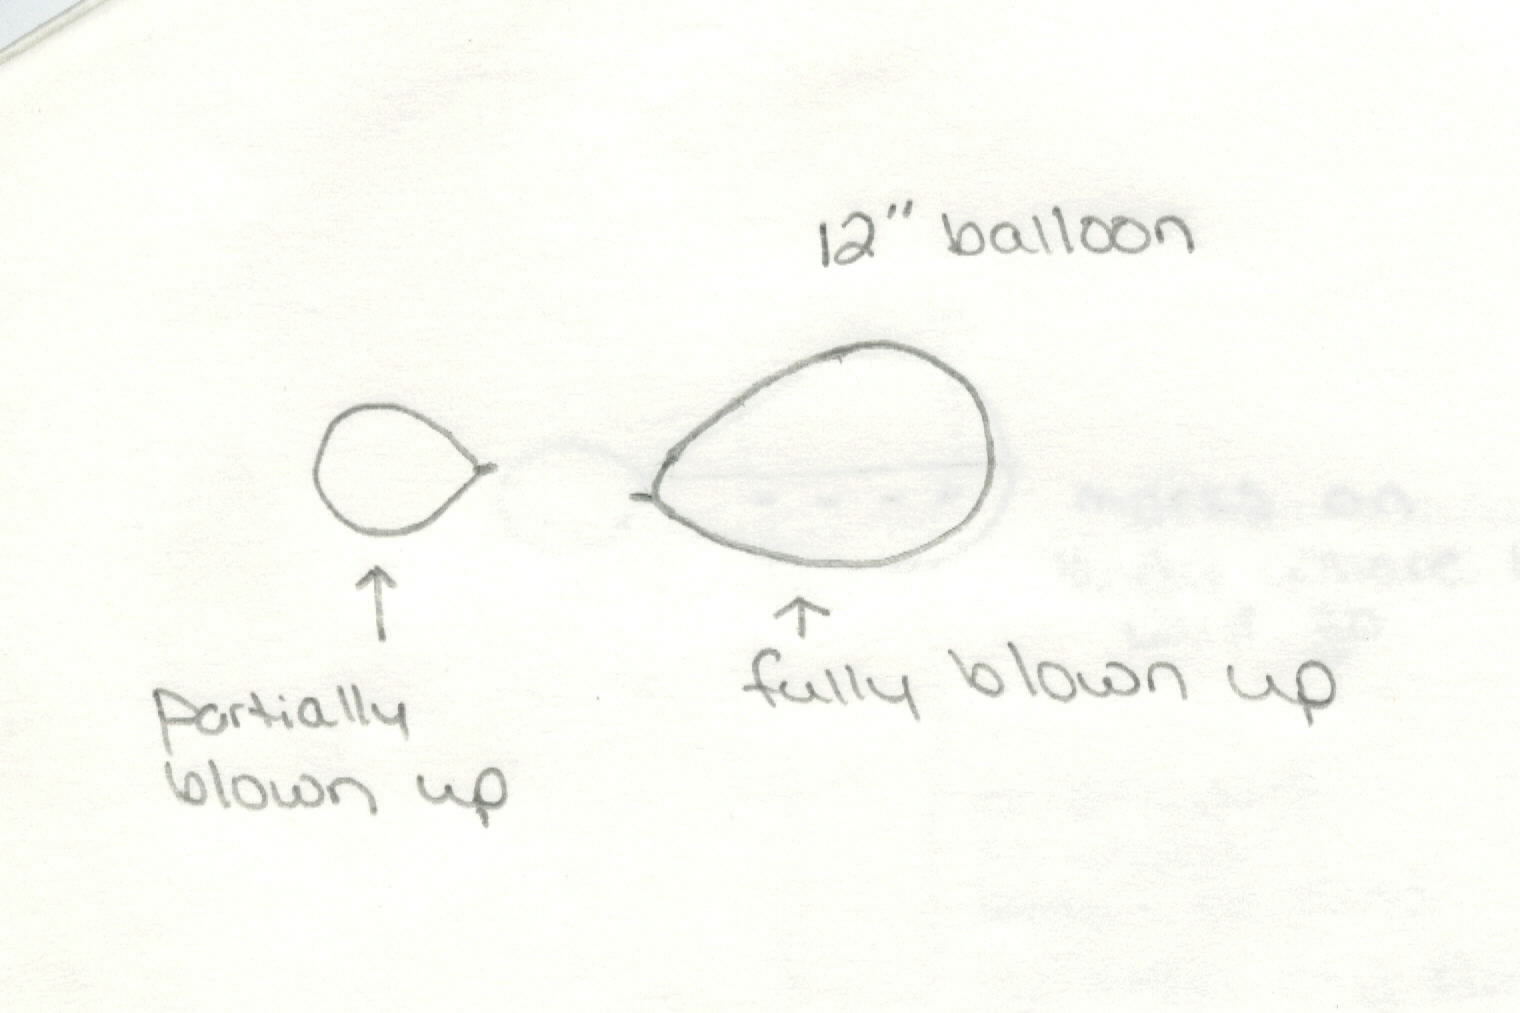
To begin, you need to blow up one 12" balloon to full size and tie, then blow up the other balloon up to the size of a big grapefruit, this one will be the spider's head.
Tie the two balloons together, then set aside.
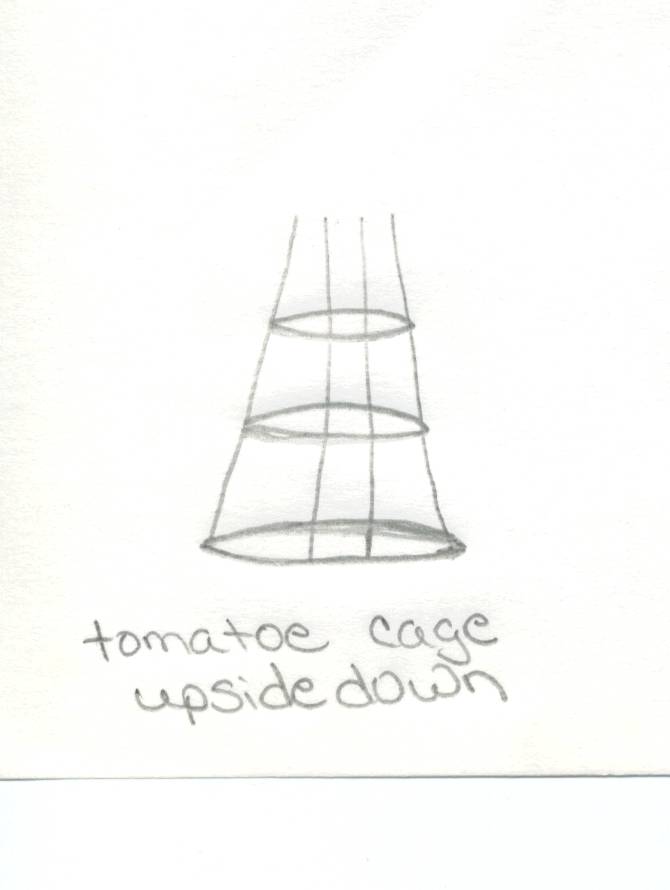 Get your tomatoe cage and turn it upside down, Get your tomatoe cage and turn it upside down,
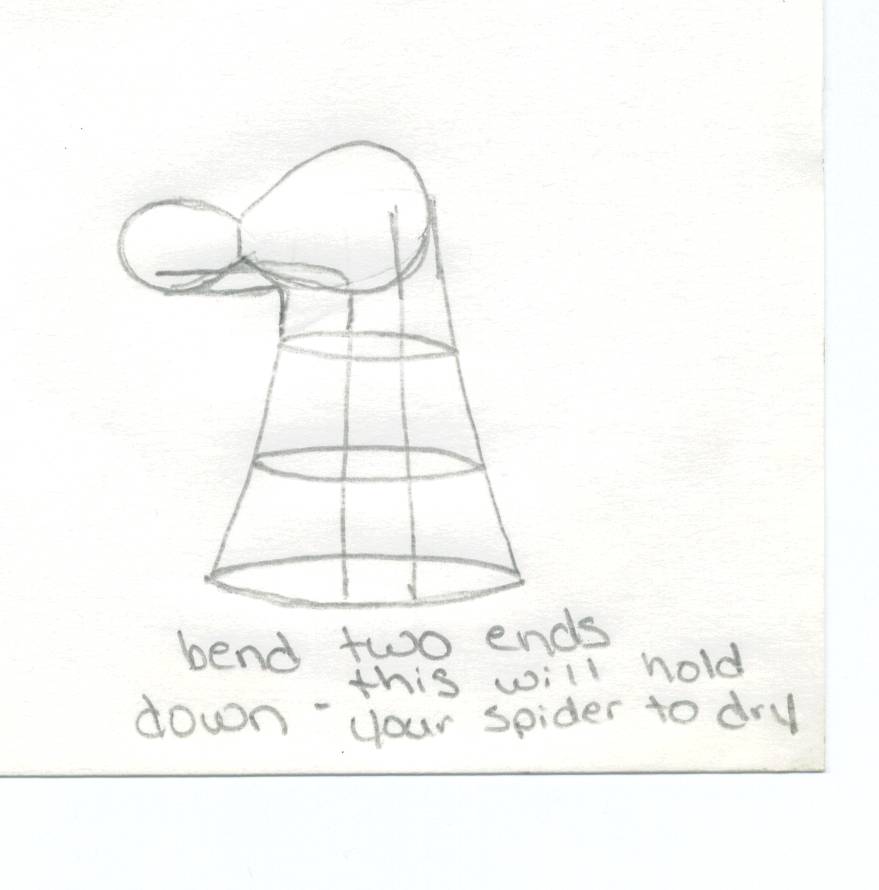
Bend two of the wires so they will be horizontal, then set aside.
Now you are ready to paper mache'! Just dip the newspaper strips into the glue mixture and wrap around each balloon, make sure to put several layers and, where the balloons are ties wrap a few strips around to help keep them together then, set on the tomatoe cage like in the picture and make sure it's in a place where it will be undisturbed for a day or two to dry.
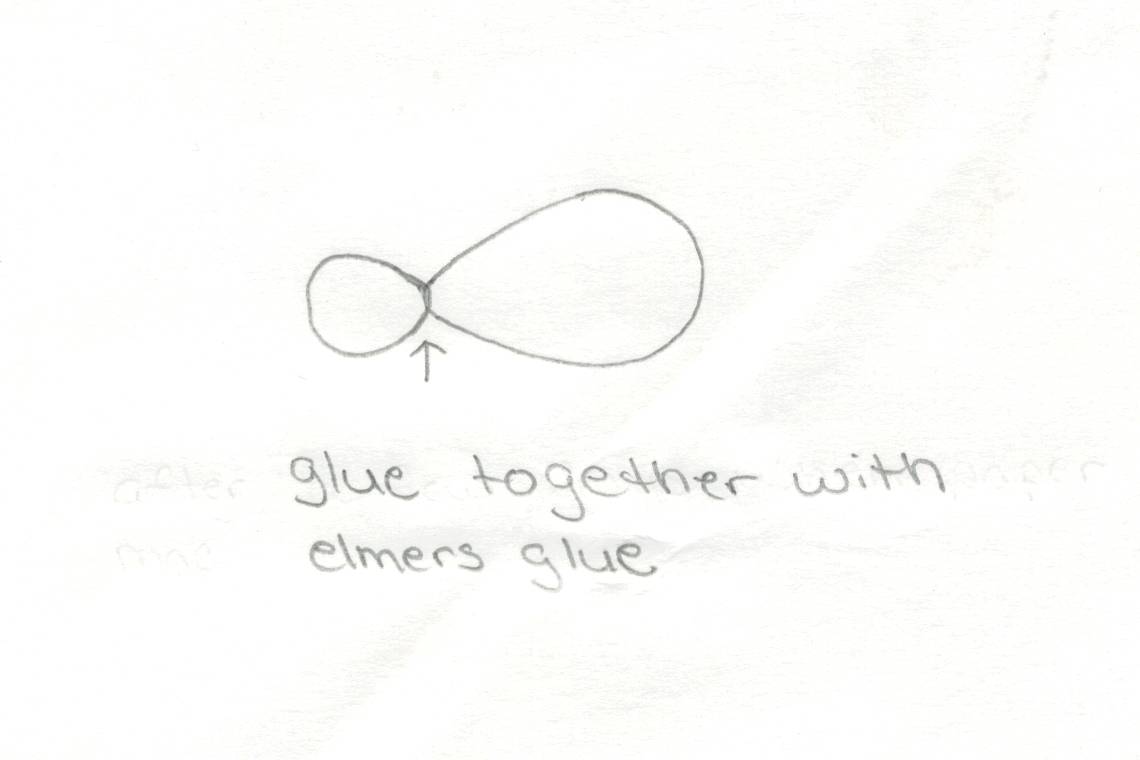
After it is dry, you can squirt a good amount (don't be stingy!!) of elmers glue around the edges of the newspaper where the two ballons come together (this helps make your spider more durable in case it gets bumped around a little, we wouldn't want the head to fall off!), place back onto the tomatoe cage and let the glue dry completely!
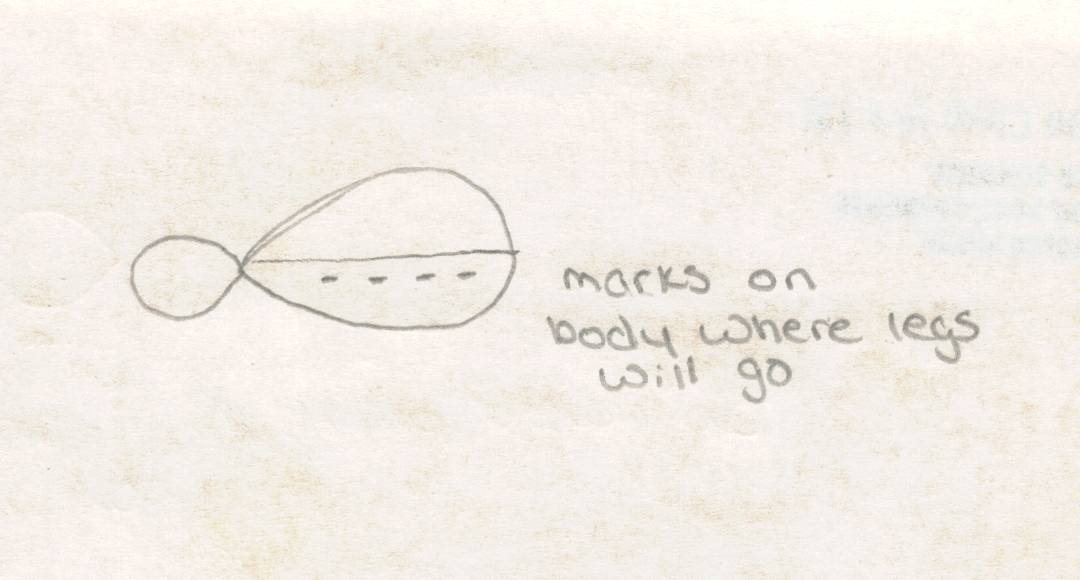 When the glue is dry place your spider body across the ice cream bucket (this will hold the spider in it's natural position so you can glue the legs on) mark on the body with a marker where the middle of the body is and about a inch below make four dashes which THIS is where you want the legs to be glued. When the glue is dry place your spider body across the ice cream bucket (this will hold the spider in it's natural position so you can glue the legs on) mark on the body with a marker where the middle of the body is and about a inch below make four dashes which THIS is where you want the legs to be glued.
Now take your plastic ribbons and hot glue them to the spider, you can bend them to look better later.
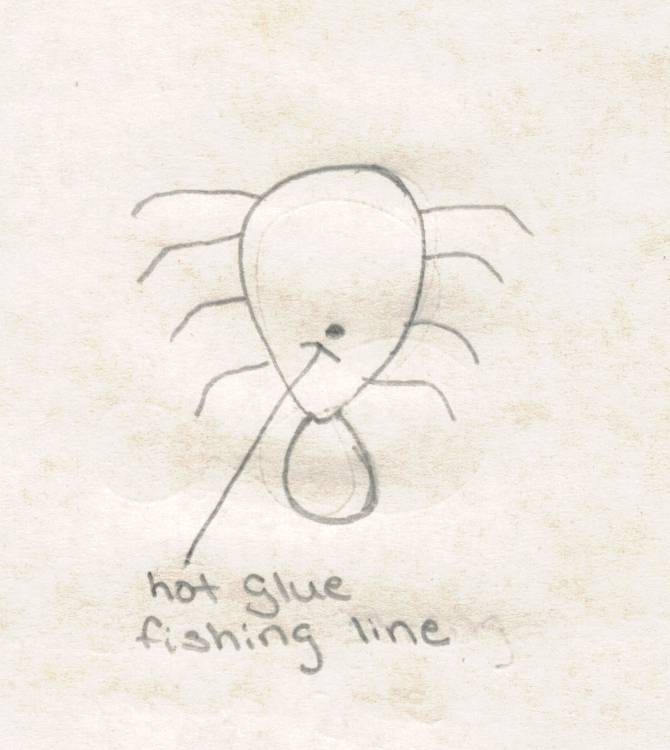
When you are done with the legs hot glue fishing string (this is to hang your spider) to the top of the spider, not directly in the center about 2 to 3 inches towards the head (this will balance your spider right so it isn't doing a nose dive) make sure to use a lot of fishing line you can wrap the extra around a small piece of cardboard so it don't get tangled but, you want a lot for when you hang him up and reuse him.
Next tie him to a clothes line, tree, or just some place away from things you don't want paint on and SPRAY PAINT him with the black spray paint. I find it easy to first hold him with one hand upside down and paint the bottom first, then hold each leg halfway down and spray the end, then the top otherwise the spider will really move on ya while painting and you'll get tired of chasing him. Then let the paint dry for awhile.
After the black paint is dry then apply the clear coat of your choice to protect your spider.
After the clear coat is dry place you spider back onto the ice cream bucket and turn your hot glue gun back on and set aside.
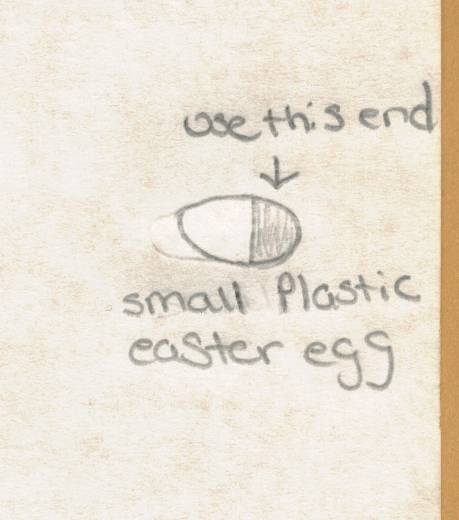
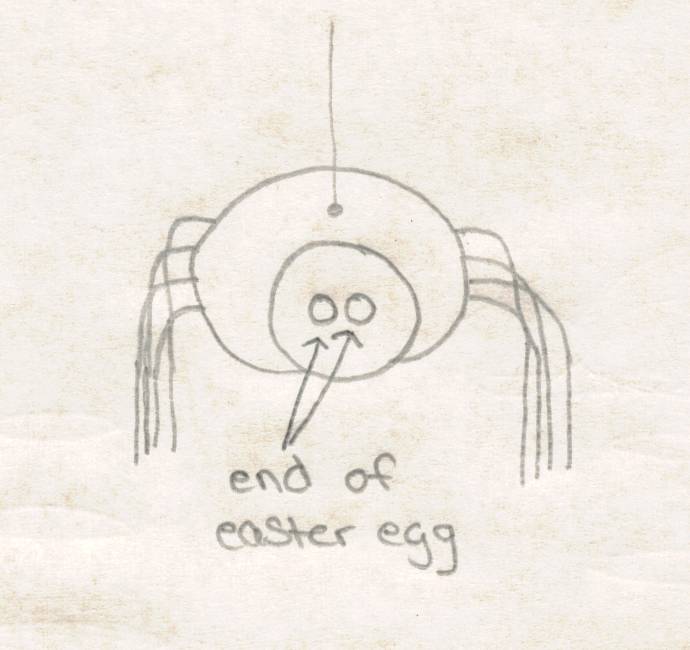
Get your small plastic Easter eggs, take them apart and you want the small fat end, squirt hot glue around the end and glue onto your spider head, there are your eyes!!
PRESTO YOU NOW HAVE A SPIDER! Hang in a safe place until you use him for halloween!
|
